Technical
Technical Information
You can find technical information relating to our products using the menu’s below. However, if you require additional information please use the contact us page of the website
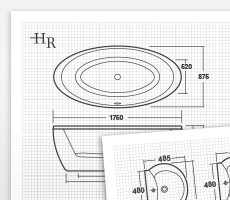
Dimensioned line drawings
Fitting instructions
Line Drawing
Fitting instructions
FAQs
Please find below a list of FAQ's covering all product types. Should you require any further technical assistance or advice relating to our products, please contact us by e-mail at technical@ultra-finishing.co.uk
Taps
Q. How do I change the cartridge within my tap?
For an overview of this simple procedure, please visit our Troubleshooting and Maintenance videos webpage.
Q. My tap is dripping and/or will not turn off fully.
Possible debris on washer or seating. Remove valve, clean rubber washer and seating. Or, valve needs replacing.
Q. My tap is discoloured/tarnished.
To maintain the appearance of these fittings please ensure they are cleaned regularly using a clean soft damp cloth only. Abrasive cleaners or detergents must not be used as they may cause surface deterioration.
Q. My taps are noisy in use.
The mains pressure is too high. Reduce accordingly. NB a pressure-reducing valve may be required.
Q. My taps heads are loose
Remove indice cap and tighten retaining screw. NB screw should be supplied with an anti rotational washer or have a serrated underside.
Q. Flow of water is poor
If ceramic disc valve, make sure you have a minimum of 0.5 bar operating pressure (as recommended) Or, If a standard screw down valve, make sure pipe work has been flushed through thoroughly before connecting to your water supply to remove any debris that may be restricting the flow.
Q. Tap spout appears loose
Make sure grub screw at back of spout is tightened. Or, where the fixing mechanism is a nut, make sure this has been screwed down fully.
Q. My tap is leaking from bottom of the spout
'O' ring on spout has more than likely perished, or has been cut. Probably caused by pushing the spout into the main body before opening the grub screw fully at the back of the spout. Replace 'O' ring. Or, loosen the grub screw and ensure spout is pushed fully into the main body to form a double seal. Retighten the grub screw.
Q. Tap heads are spinning freely on top of the valve
The plastic bush on spline has worn. Replace with new plastic bush.
Q. Water comes out of spout and handset at the same time
Remove the diverter handle, unscrew the brass gland nut and replace the diverter assembly with a new spare. Re assemble diverter handle.
Q. Water comes out of spout and handset at the same time
Diverter washer could be damaged. Lift diverter knob and use a thin adjustable spanner. Locate on nut and unscrew diverter. Check washer on bottom and replace if damaged. Or, if bath shower mixer is with ceramic disc technology and if water pressure is below 0.5 bar (as recommended) and it will not hold the diverter knob in the open position, proceed as above and remove the diverter spring. Reassemble diverter.
Q. Back legs on bath mixer are marked or damaged
Replace with new legs.
Q. I want to wall mount my bath shower mixer, how do I do this?
Please order a pair of wall mounted couplings.
Q. Decorative base flange on tap body is catching on upstand on sanitary ware
Remove decorative base flange and re-fit the product.
Q. Water coming out of handset and spout at same time
Remove spout, lift diverter knob at back of spout and check diverter washer is still in place. Or, water pressure is too low, minimum pressure required is 0.5 bar (as recommended).
Q. Wall Spout is loose or fitted off centre
Make sure spout is fitted to 'T' connector using enough P.T.F.E. tape (or other suitable sealant) to secure in position. Make sure spout is secured correctly within the wall cavity to avoid movement.
Q. Waste will not hold water
Check plug 'O' ring is not damaged. Or, check all thread on bottom of plug is set to correct height. Or possible fault with moulding on the waste hole in the basin bowl. Please ensure enough sealant is used between bowl and waste (washers only are not enough to seal some wastes).
Q. Pop up rod is not working
Make sure rod connector is fitted correctly, and height of all thread on plug has been set correctly.
Q. Dripping Tap
The main cause of ceramic tap disc tap to drip is that the pipe work hasn't been flushed of debris on installation. Remove headwork and valve and check ceramic discs for signs of scouring. If scouring or damage is evident, replace ceramic disc valve/cartridge.
Showers
Q. How do I change the temperature of my shower?
For an overview of this simple procedure, please visit our Troubleshooting and Maintenance videos webpage.
Q. Shower handset is leaking, or damaged
If leaking, check washer is still in place between handset and end of shower hose. Or If still leaking, or damaged, replace with new handset.
Q. Showering temperature is not hot enough
Incoming pressure exceeds 5 bar - ensure you have fitted pressure reducing valve in the mains supply pipe. Ensure hot water supply is at least 60C.
Q. Valve is very noisy when in use
Incoming pressure exceeds 5 bar - ensure you have fitted a pressure reducing valve in the mains supply pipe immediately after stopcock to premises.
Q. Valve is very noisy when in use
Ensure the boiler is still firing. Adjust the boiler to the hottest output, not the best flow
Radiators
Q. How much heat will I need?
All rooms are individual and therefore the heat output required from your selected radiator will vary. It is important you choose the correct radiator to ensure enough heat is generated to keep you comfortable. A sensible tip is to always choose a model with a higher heat output than you require, as this can always be controlled by turning them down.
Q. What is the measurement for heat output on radiators?
All our radiators carry the heat output measured in either: 'o BTU's' (British Thermal Unit) or 'o Watts'. Our BTU calculations use the British Standard of Delta t60c
Q. When buying a radiator what heat output will I need for my room?
It is highly recommended that your installer calculates the BTU requirement for each applicable room, so you can get the maximum heat benefit from your chosen radiator. We strongly suggest this is done before purchasing your radiator.
Q. What radiator designs offer the best heat output?
Basically, the bigger surface area that a radiator has the more heat output will be generated. Another general guide is that painted finishes offer a slightly better heat output than chrome finished items. To optimize the space you have available we offer radiator designs that can be fitted horizontally or vertically. To get additional heat output from the same area, you can also choose options that include multi rows of tubes, panels & columns.
Q. What are the colour options available?
From stock, we offer the most current fashionable colour options across a wide range of products, all of which can be seen in our current brochures. Please note that due to the printing process, the actual colours on the radiators may vary slightly from those shown in our brochures.
Q. Pipe centres
All our dimensional details are published in our current brochures. However, due to manufacturing tolerances, we strongly suggest that your final pipework position is not completed until you actually receive delivery of your radiator.
Q. Can I install an Electric-only radiator?
Where your installation location does not have immediate access to an existing water supply, we can offer purpose made electric-only products for a quick and easy solution to your heating needs. These electric only products are supplied pre filled with an electrical inhibitor solution, and fitted with a compatible heating element.
Q. What are Dual Fuel radiators?
Some of our radiators can also work as dual fuel applications, which means when your main heating system might be turned off in the summer months, you can still operate your radiators electrically if required. Please see our current brochures for suitable models.
Q. What are my Radiator valve options?
Depending on your choice of radiator, we have several styles to choose from, details of which can be found in our current brochures.
Q. Can I fit my own radiator?
Qualified persons should make all electrical and plumbing connections. When fitting radiators with heating elements, the radiator must always be mounted with the element at the bottom with the radiator in the upright position. Failure to do so may result in a fire hazard.
Q. I've installed a radiator and it is only Cold, or not fully heating up.
There are all sorts of reasons why this could be happening.1. First check that you have turned your heating on2. what is your boiler model/type? It may not be big enough to supply the requirements of the additional radiator added (Contact your boiler manufacturer for guidance)3. Has the system water level been topped up adequately to compensate for the new radiator?4. If the pipework is getting hot and the radiator is not. You may have an air lock in the system. Try bleeding the system.5. If the pipework is not getting hot you may have a blockage preventing circulation. Locate the blockage and clear.6. If the radiator only heats up partially, consider the following
a. first check both valves on the sides of the radiator are open, and if a thermostatic valve is fitted, remove the top and check the operating pin moves freely.
b. It may be that the water flow is crossing over the bottom of the radiator before the radiator fills, so slow down the return valve side, this will help the filling up of the radiator.
c. It is possible to fit a baffle to the inlet on certain types of radiator. The idea of this baffle is to encourage the water flow in a vertical direction thus filling the radiator to allow it to fully heat up. (Please note using a baffle you will need to alter the pipe centres.)
d. The boiler may not be big enough for the additional radiator added.(Contact your boiler manufacturer for guidance.)
Shower Enclosures
Q. Which way around do the Fixed and Quick Release wheels go?
The Fixed wheels are fitted to the top of the door and the Quick Release wheels are fitted to the bottom.
Q. What is the best way to clean my enclosure?
Clean after every use with a soft cloth.
Install enclosure in a well ventilated area.
Do not allow limescale to build up in hard water areas.
Ensure residual water is removed from glass after use.
Clean glass regularly using soapy water.
Do not use any abrasive products on any surfaces.
Q. Are the enclosures CE approved?
All enclosures are CE certified and tested.
Q. Is a low profile shower tray available?
A 40mm thick low profile tray is available to suit every enclosure. Leg sets can be screwed directly into the bottom of the tray to raise the height.
Baths
Q. How do I care for my bath?
Clean with a soft damp cloth and warm soapy water. Never use abrasive cleaner, it will scratch the surface of the acrylic and make it lose it shine. If you do scratch your bath we recommend using an enamel cleaning agent or car polish (T-Cut)
Q. Does the bath include a leg fixing kit?
All our baths are supplied with legs.
Q. Are bath panels available?
We have panels to fit every standard bath size.
Q. How thick are the baths?
The standard baths are 4mm thick acrylic sheet. Eternalite baths are 5mm thick. All our baths are reinforced and fully encapsulated.
Furniture
Q. How do I care for my furniture?
Most everyday stains can be removed by using a damp cloth and soapy water. Do not use any abrasives or scouring pads. Spillages should wiped off immediately as any standing liquids can cause damage.
Q. Are colour samples available?
Yes we have colour swatches available on request through our Marketing team.
Sanitaryware
Q. How do I clean and care for ceramics?
Clean regularly after use to reduce build up of dirt.
Use warm soapy water, cream or liquid cleaner.
Don’t put bleach in the cistern – this can damage the internal fittings. You can of course use bleach in the toilet bowl itself.
Don’t leave strong bleach or cleaners in the WC overnight – they can react and give off poisonous gases.
Troubleshooting and Maintenance Videos
For a step-by-step guide to troubleshooting issues or general maintenance of our shower valves, please click on the appropriate video to view a clear and precise guide which will take you through the process
-
Bar Type Shower Calibration Procedure - Modern Handle
Duration 01:07
Video Description
-
Bar Type Shower Calibration Procedure - Minimalist Handle
Duration 01:39
Video Description
-
Bar Type Shower Cartridge Exchange Procedure
Duration 03:08
Video Description
-
Sequential Type Shower Calibration Procedure - Modern Handle
Duration 02:04
Video Description
-
Twin and Triple Type Shower Calibration
Duration 01:12
Video Description
-
Sequential Type Shower Cartridge Exchange Procedure
Duration 02:39
Video Description
-
Sequential Type Shower Calibration Procedure - Tec Handle
Duration 01:21
Video Description
-
Cartridge Exchange for Single Lever Taps
Duration 01:50
Video Description
-
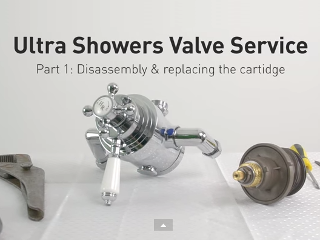
1/2" Dual Valve - 2009 Onwards. Cartridge Replacement (Valquest Cartridge)
Duration 06:33
Video Description
-
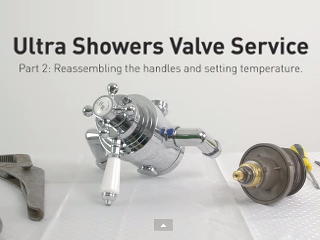
1/2" Dual Valve - 2009 Onwards. Temperature Setting (Valquest Cartridge)
Duration 03:28
Video Description
-
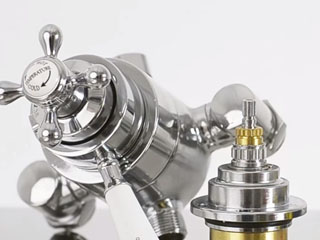
3/4" Dual Valve - Pre 2009. Cartridge Replacement (Brass Cartridge)
Duration 07:05
Video Description
-
3/4" Dual Valve - Pre 2009. Temperature Setting (Brass Cartridge)
Duration 01:52
Video Description
